A RadioButton control provides a round interface to select one option from a number of options. Radio buttons are usually placed in a group on a container control such as a Panel or a GroupBox and one of them is selected.
Creating a RadioButton
We can create a RadioButton control using a Forms designer at design-time or using the RadioButton class in code at run-time (also known as dynamically).
To create a RadioButton control at design-time, you simply drag and drop a RadioButton control from Toolbox to a Form in Visual Studio. After you drag and drop a RadioButton on a Form, the RadioButton looks like Figure 1. Once a RadioButton is on the Form, you can move it around and resize it using mouse and set its properties and events.
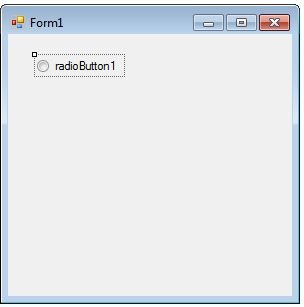
Figure 1
Creating a RadioButton control at run-time is merely work of creating an instance of RadioButton class, set its properties and add RadioButton class to the Form controls.
First step to create a dynamic RadioButton is to create an instance of RadioButton class. The following code snippet creates a RadioButton control object.
Dim dynamicRadioButton As New RadioButton()
In the next step, you may set properties of a RadioButton control. The following code snippet sets location, width, height, background color, foreground color, Text, Name, and Font properties of a RadioButton.
dynamicRadioButton.Left = 20
dynamicRadioButton.Top = 100
dynamicRadioButton.Width = 300
dynamicRadioButton.Height = 30
dynamicRadioButton.BackColor = Color.Orange
dynamicRadioButton.ForeColor = Color.Black
dynamicRadioButton.Text = "I am a Dynamic RadioButton"
dynamicRadioButton.Name = "DynamicRadioButton"
dynamicRadioButton.Font = New Font("Georgia", 12)
Once a RadioButton control is ready with its properties, next step is to add the RadioButton control to the Form. To do so, we use Form.Controls.Add method. The following code snippet adds a RadioButton control to the current Form.
Controls.Add(dynamicRadioButton)
New RadioButton created by the above code looks like Figure 2.

Figure 2
Setting RadioButton Properties
After you place a RadioButton control on a Form, the next step is to set properties.
The easiest way to set properties is from the Properties Window. You can open Properties window by pressing F4 or right click on a control and select Properties menu item. The Properties window looks like Figure 3.
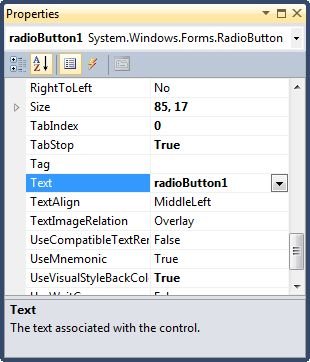
Figure 3
Location, Height, Width, and Size
The Location property takes a Point that specifies the starting position of the RadioButton on a Form. You may also use Left and Top properties to specify the location of a control from the left top corner of the Form. The Size property specifies the size of the control. We can also use Width and Height property instead of Size property. The following code snippet sets Location, Width, and Height properties of a RadioButton control.
dynamicRadioButton.Location = New Point(20, 150)
dynamicRadioButton.Height = 40
dynamicRadioButton.Width = 300
Background, Foreground, BorderStyle
BackColor and ForeColor properties are used to set background and foreground color of a RadioButton respectively. If you click on these properties in Properties window, the Color Dialog pops up.
Alternatively, you can set background and foreground colors at run-time. The following code snippet sets BackColor and ForeColor properties.
dynamicRadioButton.BackColor = Color.Red
dynamicRadioButton.ForeColor = Color.Blue
Name
Name property represents a unique name of a RadioButton control. It is used to access the control in the code. The following code snippet sets and gets the name and text of a RadioButton control.
dynamicRadioButton.Name = "DynamicRadioButton"
Text and TextAlign
Text property of a RadioButton represents the current text of a RadioButton control. The TextAlign property represents text alignment that can be Left, Center, or Right. The following code snippet sets the Text and TextAlign properties and gets the size of a RadioButton control.
dynamicRadioButton.Text = "I am a Dynamic RadioButton"
dynamicRadioButton.TextAlign = ContentAlignment.MiddleCenter
Font
Font property represents the font of text of a RadioButton control. If you click on the Font property in Properties window, you will see Font name, size and other font options. The following code snippet sets Font property at run-time.
dynamicRadioButton.Font = nNw Font("Georgia", 16)
Read RadioButton Contents
The simplest way of reading a RadioButton control contents is using the Text property. The following code snippet reads contents of a RadioButton in a string.
Dim RadioButtonContents As String = dynamicRadioButton.Text
Appearance
Appearance property of RadioButton can be used to set the appearance of a RadioButton to a Button or a RadioButton. The Button look does not have a round select option. The following property makes a RadioButton look like a Button control.
dynamicRadioButton.Appearance = Appearance.Button
Check Mark Alignment
CheckAlign property is used to align the check mark in a RadioButton. By using CheckAlign and TextAlign properties, we can place text and check mark to any position on a RadioButton we want. The following code snippet aligns radio button round circle and text to middle-right and creates a RadioButton that looks like Figure 4.
dynamicRadioButton.CheckAlign = ContentAlignment.MiddleRight
dynamicRadioButton.TextAlign = ContentAlignment.MiddleRight
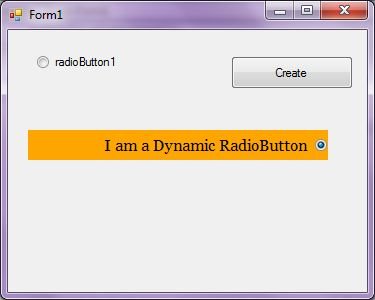
Figure 4
AutoEllipsis
An ellipsis character (...) is used to give an impression that a control has more characters but it could not fit in the current width of the control. If AutoEllipsis property is true, it adds ellipsis character to a control if text in control does not fit. You may have to set AutoSize to false to see the ellipses character. The following code snippet sets the AutoEllipsis property of a RadioButton to true.
dynamicRadioButton.AutoEllipsis = True
Figure 5 shows a RadioButton when AutoEllipsis is true and contents does not fit in the given width of the control.
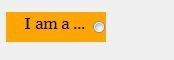
Figure 5
Image in RadioButton
The Image property of a RadioButton control is used to set the background as an image. The Image property needs an Image object. The Image class has a static method called FromFile that takes an image file name with full path and creates an Image object.
You can also align image and text. The ImageAlign and TextAlign properties of RadioButton are used for this purpose.
The following code snippet sets an image as a RadioButton background.
dynamicRadioButton.Image = Image.FromFile("C:\Images\Dock.jpg")
dynamicRadioButton.ImageAlign = ContentAlignment.MiddleRight
dynamicRadioButton.FlatStyle = FlatStyle.Flat
RadioButton States
A typical RadioButton control has two possible states â€" Checked and Unchecked. Checked state is when the RadioButton has check mark on and Unchecked is when the RadioButton is not checked. Typically, we use a mouse to check or uncheck a RadioButton.
Checked property is true when a RadioButton is in checked state.
dynamicRadioButton.Checked = True
Usually, we check if a RadioButton is checked or not and decide to take an action on that state something like following code snippet.
If (dynamicRadioButton.Checked) Then
Else
End If
AutoCheck property represents whether the Checked or CheckState values and the RadioButton's appearance are automatically changed when the RadioButton is clicked. By default this property is true but if set to false.
dynamicRadioButton.AutoCheck = False
RadioButton Checked Event Hander
CheckedChanged event occurs when the value of the Checked property changes. To add this event handler, you go to Events window and double click on CheckedChanged events as you can see in Figure 6.
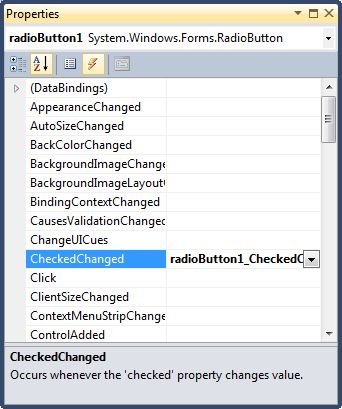
Figure 6
The following code snippet defines and implements these events and their respective event handlers. You can write this code to implement CheckedChanged event dynamically.
Friend WithEvents RadioButton1 As System.Windows.Forms.RadioButton
Private Sub RadioButton1_CheckedChanged(ByVal sender As System.Object, ByVal e As System.EventArgs) _
Handles RadioButton1.CheckedChanged
End Sub
Summary
In this article, we discussed discuss how to create a RadioButton control in Windows Forms at design-time as well as run-time. After that, we saw how to use various properties and methods.