WPF Transparent Brushes in VB.NET
All elements in XAML including all brushes have an Opacity attribute that defines the transparency of an element. This article demonstrates how to use Opacity to implement transparent brushes in WPF using XAML.
Transparent Brushes
All elements in XAML including all brushes have an Opacity attribute that defines the transparency of an element. The value of Opacity is between 0 and 1. The value 0 means an element is fully-transparent and value 1 means an element is fully opaque. The default value of Opacity is 1.
The following code snippet creates a SolidColorBrush with 50% transparency. You can set the Opacity attribute of any brush using same code.
<SolidColorBrush Color="Blue" Opacity="0.5"/>
Now if we set Opacity of code in 25 as following, the output that looks like Figure 33 will look like Figure 34.
<VisualBrush Viewport="0,0,0.25, 0.25" TileMode="Tile" Opacity="0.5">
The following code snippet sets the Opacity property of a VisualBrush at run-time.
Dim vBrush As New VisualBrush()
vBrush.Opacity = 0.5R
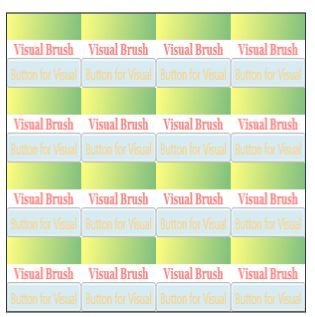
Figure 34. A rectangle with a transparent Visual brush in Tile mode
Transparent Controls
Good part is, this Opacity property not only is available for brushes but also for all elements in WPF and XAML. That means, you can create transparent Windows, Pages, Controls, or User Controls by simply setting this property.