Create SQL Login via SQL Server Management Studio in SQL Server 2008
In this article I will explain how to create login using SQL Server Management Studio.
Introduction
SQL Server login is nothing but simply a credentials to access SQL Server. For example you provide username and password to access e-mail account. Using credentials decides what the user is allowed to access in SQL Server. For example , a specific user is not allowed to access a particular database or even to alter it.
There are various methods to create SQL Server login.
- Using SQL Server Management Studio.
- Using SQL query.
- Using system stored procedure
In this article I will explain how to create login using SQL Server Management Studio. Go through following steps to create login.
Step 1
Open SQL Server Management Studio and connect to database engine.
Step 2
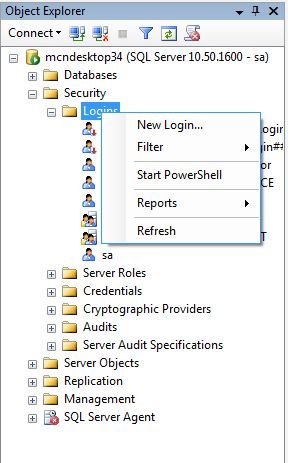
In object explorer step down to the Security object node. Right-click a Logins node and choose New Login from popup menu.
Step 3
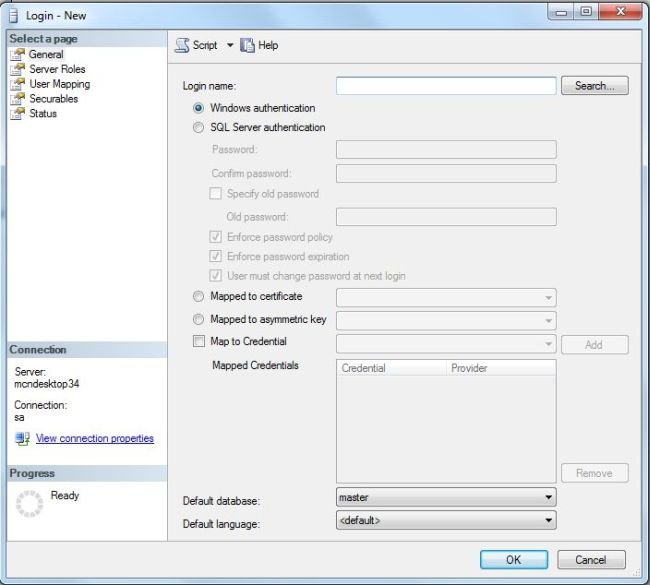
When you click on New Login you will get the below window.
Step 4
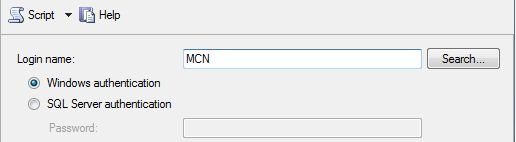
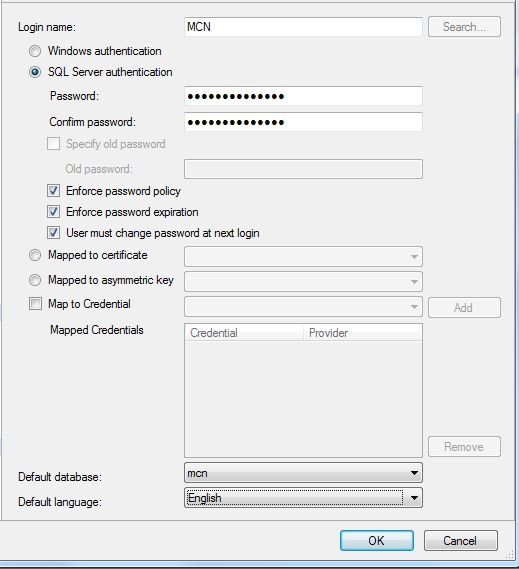
Enter the login name.
Step 5
Choose the authentication either windows authentication or SQL Server authentication and choose the default database to which user is allowed to access. Choose Default language for the user.
Step 6
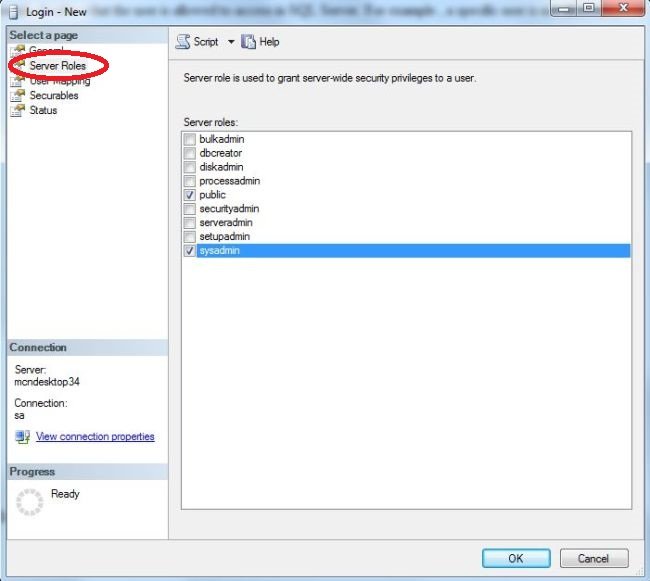
In the Login-new window, from left panel choose Server Roles. You can specify the role of the user and it's server role. Here I choose public and sysadmin.
Step 7
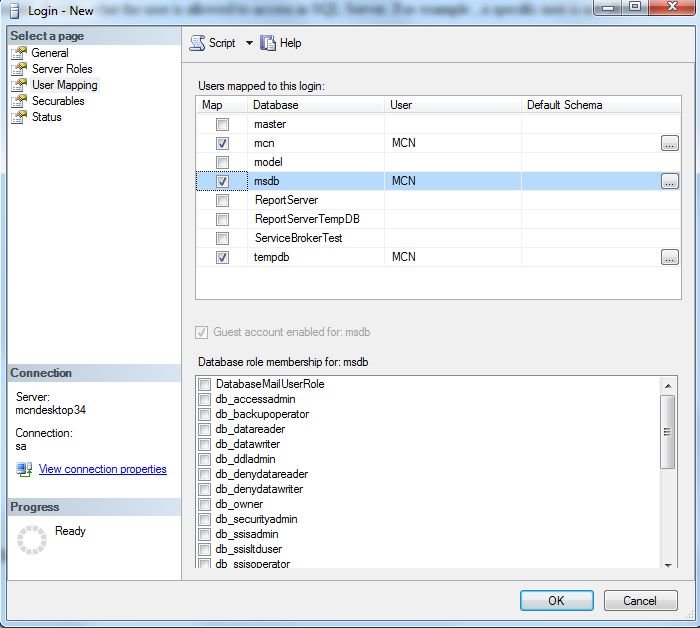
In the Login-new window, from left panel choose User mappings to decide level of access of user to access databases.
Step 8
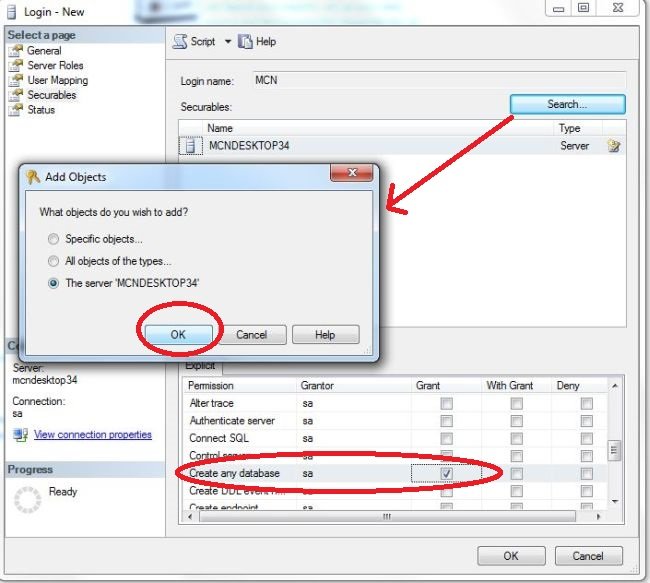
In the Login-new window, from left panel choose Securables so that you can choose the object on which you want to provide or deny access. For example I select mcndesktop34 and select deny create database.
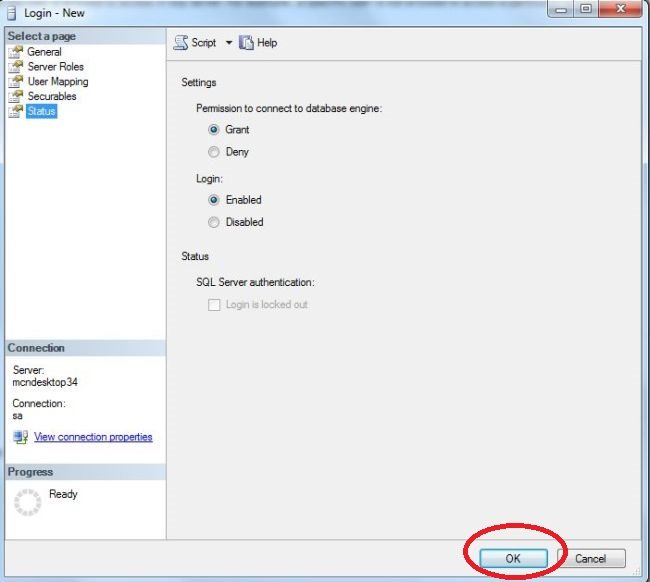
Step 9
In the Login-new window, from left panel choose Status which specifies the current status of user. Click OK to save all settings.
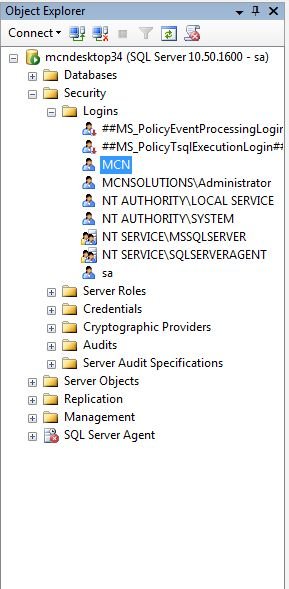
Step 10
Refresh the Login node from object explorer. You will see new login named MCN is created.