Creating a RepeatButton
The RepeatButton XAML element represents a WPF RepeatButton control.
<Button/>
The Width and Height attributes represent the width and the height of a RepeatButton. The Content property sets the text of button. The Name attribute represents the name of the control, which is a unique identifier of a control.
The code snippet in Listing 1 creates a Button control and sets its name, height, width, and content.
<RepeatButton Margin="10,10,0,0" VerticalAlignment="Top"
HorizontalAlignment="Left"
Name="GrowButton" Width="80" Height="30">
</RepeatButton>
Listing 1
The default property of a button is Content. The code snippet in Listing 2 creates the same button as created by Listing 1.
<RepeatButton Margin="10,10,0,0" VerticalAlignment="Top"
HorizontalAlignment="Left"
Name="GrowButton" Width="80" Height="30">
Grow
</RepeatButton>
Listing 2
The output looks like Figure 1.

Figure 1
Delay and Interval
The Delay and Interval properties make a RepeatButton different than a normal button.
A RepeatButton is a button that fires Click events repeatedly when it is pressed and held. The rate and aspects of repeating are determined by the Delay and Interval properties that the control exposes.
The code snippet in Listing 3 sets the Delay and Interval properties.
<RepeatButton Margin="10,10,0,0" VerticalAlignment="Top"
HorizontalAlignment="Left"
Name="GrowButton" Width="80" Height="30"
Delay="500" Interval="100"
>
Grow
</RepeatButton>
Listing 3
Adding a Button Click Event Handler
The Click attribute of a RepeatButton element adds the click event handler and it keeps firing the event for the given Interval and delay values. The code in Listing 4 adds the click event handler for a Button.
<Button x:Name="DrawCircleButton" Height="40" Width="120"
Canvas.Left="10" Canvas.Top="10"
Content="Draw Circle"
VerticalAlignment="Top"
HorizontalAlignment="Left">
Click="DrawCircleButton_Click"
</Button>
Listing 4
The code for the click event handler looks like following.
Private Sub GrowButton_Click(ByVal sender As Object, ByVal e As RoutedEventArgs)
End Sub
OK now let's write a useful application.
We are going to build an application with two buttons - Grow and Shrink and a rectangle. The application looks like Figure 2.
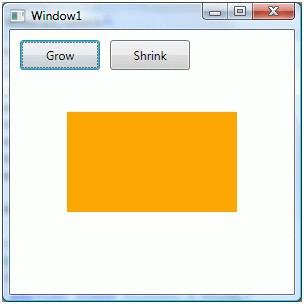
Figure 2
When you click and keep pressing the Grow button, the width of rectangle will keep growing and when you click on the Shrink button, the width of rectangle will keep shrinking.
The final XAML code is listed in Listing 5.
<Window x:Class="RepeatButtonSample.Window1"
xmlns="http://schemas.microsoft.com/winfx/2006/xaml/presentation"
xmlns:x="http://schemas.microsoft.com/winfx/2006/xaml"
Title="Window1" Height="300" Width="300">
<Grid Name="LayoutRoot">
<RepeatButton Margin="10,10,0,0" VerticalAlignment="Top"
HorizontalAlignment="Left"
Name="GrowButton" Width="80" Height="30"
Delay="500" Interval="100"
Click="GrowButton_Click">
Grow
</RepeatButton>
<RepeatButton Margin="100,10,0,0" VerticalAlignment="Top"
HorizontalAlignment="Left"
Name="ShrinkButton" Width="80" Height="30"
Delay="500" Interval="100"
Click="ShrinkButton_Click">
Shrink
</RepeatButton>
<Rectangle Name="Rect" Height="100" Width="100" Fill="Orange"/>
</Grid>
</Window>
Listing 5
Listing 6 is the click event handlers for the buttons that change the width of rectangle.
Private Sub GrowButton_Click(ByVal sender As Object, ByVal e As RoutedEventArgs)
Rect.Width += 10
End Sub
Private Sub ShrinkButton_Click(ByVal sender As Object, ByVal e As RoutedEventArgs)
Rect.Width -= 10
End Sub
Listing 6